Sunday, May 12, 2013

A little bit of altering...

I have been doing a lot of altering lately!  I will go through the house and see something and say to myself, "oh I could do something with that"!  That is exactly what I did with this project.


Do you have one these or have seen them?  This a bill organizer.  I found it at a flea market for $2 or $3 dollars.  It was just sitting in my kitchen not being used.  The other day I looked at it and a light bulb went off (if my husband reads this he will say that doesn't happen very often) and the scrapbooker in me had an idea. This would be perfect to hold those larger scraps of paper that you just have thrown into a basket, so yesterday I went to work on it!

So first I covered it with Gesso so that the paint would not chip off.  I will tell you the secret to getting between the little slots (because they don't come out) is using a foam brush.  Then I just took a small brush to get in the corners as best as I could.  I couldn't get the slots completely covered, but scraps of paper will be in there anyway to cover it up.


I then painted with black acrylic paint and you can see that I was able to get into the slots completely  I painted all four sides with two coats for good coverage. (Excuse the mess in the background it is on my worktable.

Next:

I figured out the colors I was going to use on it and I decided to go with the colors from the BoBunny Country Garden Collection.  I started digging through all of my stuff for texture, this needed to have texture to it.  I found this twisted paper in a Robin's Egg Blue and I thought perfect.  I also found some gauze and old pages from a book. 


Time to unroll the twisted paper and my mind is going ninety to nothing thinking of all of the things I can use this on!!!  Anyway...


Sorry for brightness of the pic...This stuff was a booger to unroll, but it lost and I won the battle!


Now to start tearing it and adhering it with Modge Podge (I love that stuff, it reminds me of being little and putting Elmer's glue all over your hands and then peeling it off, lol).  After I put the paper on there I then put some guaze, pieces of torn doilies, torn pages from books to give it texture.


I think cut out pieces from the Country Garden Almanac by Bo Bunny and adhered them to the sides with the Modge Podge.


Once that was all completed and dried I sanded the edges and the top to give it a distressed look.  Make sure this is completely dry before you do this or you will have a big mess!


After I added all of my textures and the Modge Podge was dry I used Sorbet Dimensional Gel Paint by Art Anthology.  I LOVE this stuff!!!  I used it this past weekend in a class taught by Jen Starr and fell in love with it!  Anyway the color that used was Viridian and let me say that the color is amazing!  Then I went through all of my little trinkets finding the perfect pieces to use on this.  Once I adhered the metal pieces with E6000 (this glue will hold ANYTHING) and let the glue dry competely.


I then started placing all of my flowers and other trinkets that I found.  Once I was happy with the way that it was coming, I glue all of them with Beacon 3-in-1 glue (yep, I love this stuff too!)  I then covered it all with Gesso (except for the metals).  Once I was happy with that, I used dYlusions Ink Spray inWhite linen and sprayed all over.  On the black parts I sprayed a couple of coats letting each coat dry completely.


Here is my altered Scrap Box


Here is one side view.  I didn't put any embellishments on the side as I will have other things on each side of the box on my desk. 


The other side view.


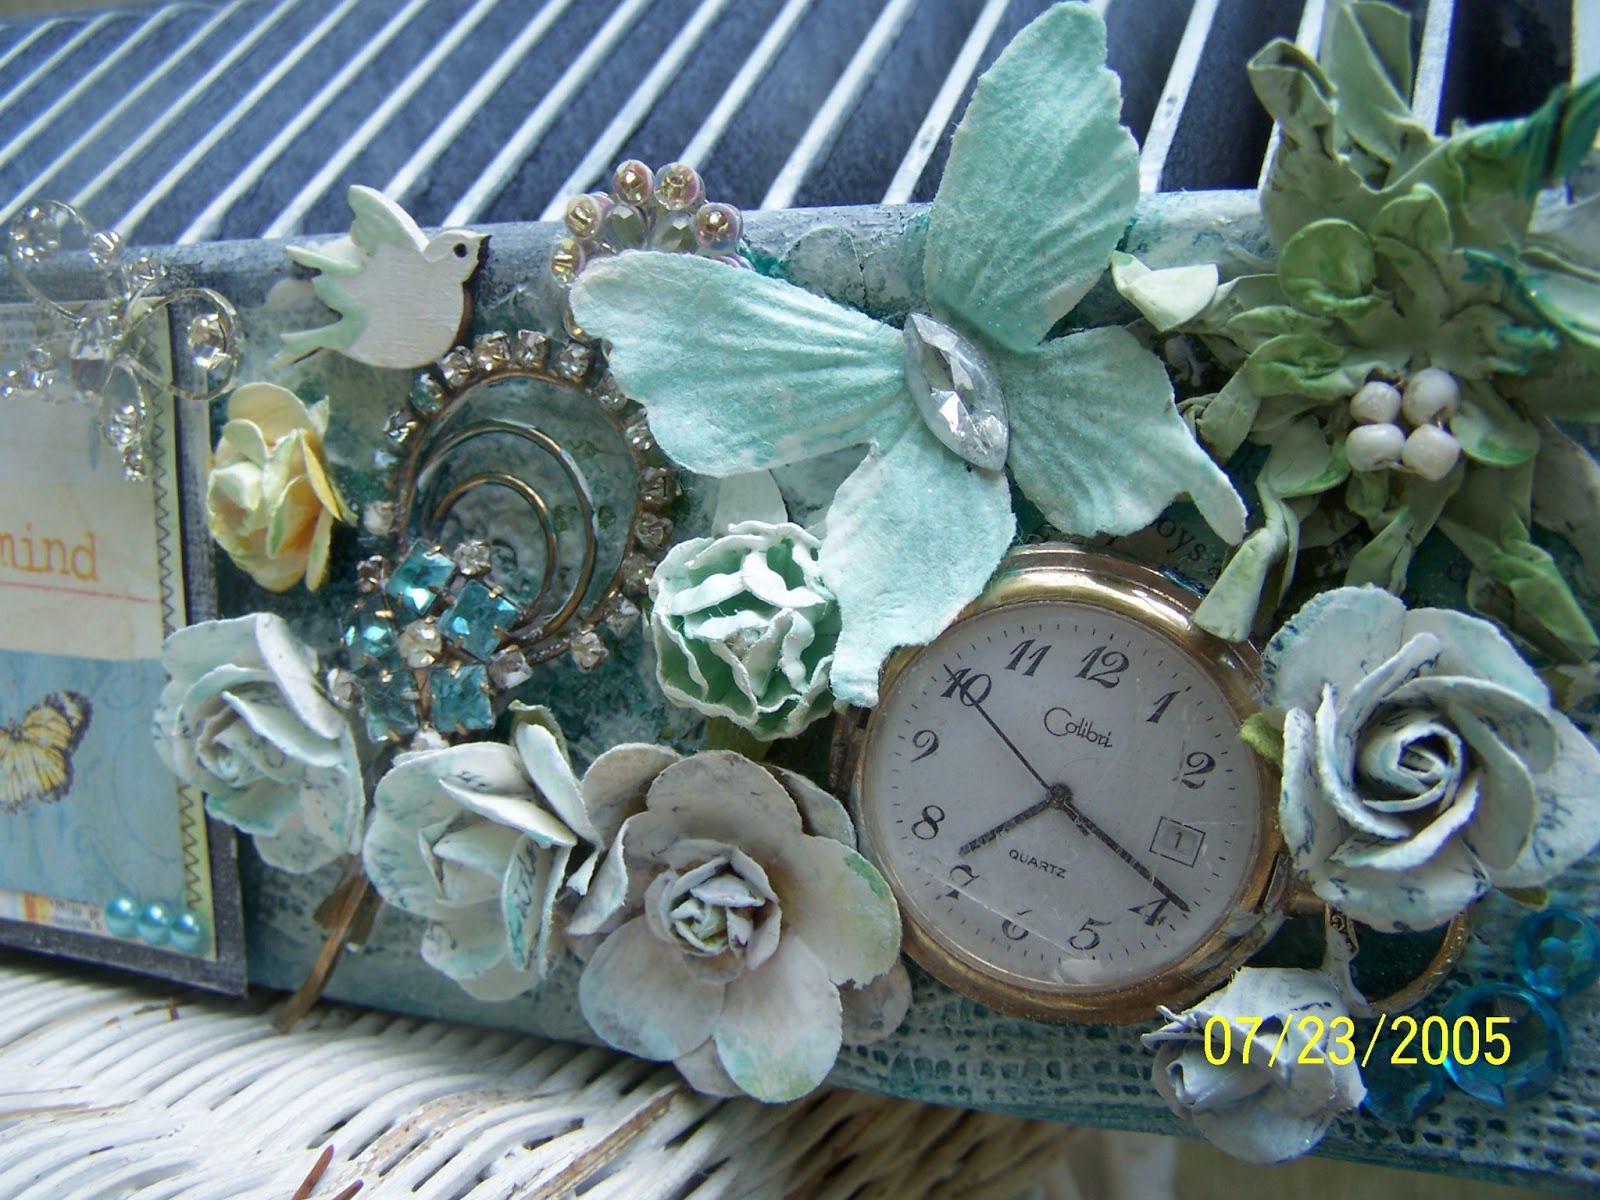
Some details.  I used Viva Decor Pearl Pens on the butterfly and on the wings of the birds.  And I used the Art Anthology Sorbet in the color of Viridian again on the wooden key.


I used a mixture of Prima flowers and flowers that were made for me by my best friend, she is wonderful and makes beautiful flowers!  I also used Prima bling and some of the other bling on here is from Micheal's.  The butterfly is from Recollections.  It was white and I painted it with Tattered Angel's Glam in the color of Tide Pool, it blended perfectly and gave the butterflies a little sparkle to them.


The title is also from Bo Bunny's Country Garden Collection and I matted it on Black Bazzill Bling (try to say that real fast three times) textured paper.

 I used some vintage jewelry pieces that I found in my stash and thought that they went perfect on the box.
You can also see where I went over some the flowers with Tattered Angels Glam in Tide Pool also.


And last but not least I wanted to show you this blingy butterfly.  It was actually a hair clip and I just took the clip off.


I hope that you enjoyed looking at my altered scrap box.  Go do one for you now ;o)

Happy Altering!

Sandy


Wednesday, April 24, 2013

Graphic 45 Secret Garden Mini Album

This is my Graphic 45 Secret Garden Mini Album that I created.

On the cover I used a variety of techniques.  I used Gesso, my homemade texturing paste (baking soda and white gesso), inking, glimmer mists, paint...you name it, everything but the kitchen sink!
 This is page 1.  I cut the gate out with an svg on my Cameo Silhouette.  I then backed it with vellum.  When you open it up there are photo mats.
Page two is a half page!  All I did here was add a quote block and did some inking.  I just love the way this page is so I couldn't add anything ;o)
 Page 3 has a photo mat with a ATC attached to hold other ATC's or whatever else may be found to fit.
 Page 4 I did a photo mat that is inked.  I also did a tag frame.  This frame has texturing paste on it and then I dried it and used my distress inks and glimmer mist for the finishing touches on it.  The left side and top of the tag frame are left open to enable goodies to be stashed!!!
 Page 5 I tore and inked a pocket to be able to put photo mats inside.  On one side of the photo mat there is also a pocket to hold ATC's and a Cameo placed on it.
 Page 6 also has a torn pocket.  There are several photo mats that a double sided to be able to add more pictures.  I also stashed some ATC's in here as well.

Now please excuse my pictures.  The weather is just now starting to get to where I will be able to take pictures outside.

I hope you enjoy looking at this album, I enjoyed making it!

Saturday, March 30, 2013

Dust bunnies...

Well I guess it is time to blow the dust bunnies out of the ol blog....Time to start posting again.  I am not going to bore you with everything that is going on in my everyday life right now.  I just want to post some things that I have created lately.  I hope you enjoy them as much as I did creating them.


The pictures aren't the greatest as I had to take them inside and on my phone.  Leave to me to break my lens on my camera and can only use the telephoto lens. And of course the weather won't cooperate to take them outside.  I think the groundhog lied this year!!!!

Enjoy!

Sandy

Tuesday, November 20, 2012

OH MY WOW!!!!


I can't believe how long it has been since I have made a blog post.  I guess I just needed a hiatus and boy did I take a long one.  I am finally scrapbooking again and had forgotten what it meant to me to be able to create art.  But there has been so much going on with life that I just couldn't create.  But I am happy to say officially that I am back and I hope to continue to create and share.  Here are several layouts that I have created recently....

This is my grand-daughter when she was a baby.  She is three now, wow where has the time gone?


This is my daughter Ariel....she is so photogenic.  This was one of her senior pictures that I took of her.  This was taken at the Cultural Center at the Capital.


And last but not least the is my son Cody and his girlfriend Victoria.  Aren't they a beautiful couple?


I have to share this picture.  When the hurricane hit the east coast last month our power was out for a while.  We received quite a bit of snow, heavy wet snow....so most know what that means:  no power.  Well I wanted something sweet to eat and we had to eat the food in the fridge so that we didn't lose it (although we did lose a lot of it)...but I found the cinnamon roles.  So desperate times call for desperate measures.....

Yes that is my dutch oven on top of the kerosene heater and YES you can cook cinnamon rolls on top of the kerosene heater!  AND they were yummy!

And the next two pictures are why we were without power!!!!


Now I want to post something that I am very proud of.  My son Cody.  Cody is in military school at Mountaineer Challenge Academy.  He is doing so awesome and I am so very proud of him and the man that he has become in this program.  My son left a boy and has become an amazing man, the man I knew that he had the potential of being.


Isn't he a handsome man?  I know that I am partial, but he is a handsome devil.

Oh well, that is all for today, I am sitting in a hotel room that I can pick up my handsome devil for Thanksgiving break tomorrow.  It is time for The Voice ;o)

I will be posting more!

Toodles....
Sandy

Saturday, March 24, 2012

It's Blog Hop Time!!!

WELCOME! Thank you all for stopping by the Addicted 2 Scrapping Spring Blog Hop! As you hop along be sure to subscribe/follow to the individual design team members' blogs so you don't miss out on all of the gorgeous projects they are creating...and stop by our Facebook page, Addicted 2 Scrapping, and LIKE us if you haven't already! 

Now on to what I created... 


The dress form that I used was from this month's kit at Flying Unicorn.  They have the most amazing kits!

Now to explain how I made this beautiful dress form... I first painted the dress from with gold Dreamcoat paint on both sides.  For the stand I painted it brown and then went over it with Rock Candy Distress Crackle Paint.  Once everything was dry I decided on the paper and applied it to the side that was going to be the back of the form.  I used KaiserCraft's Duchess Collection.  I then used some white tulle for the skirt that had dots of gold glitter on it.  I then used some old paper that I had that was cream colored and shiny for the top. I added different laces and some pearls to the waist.  I put an old hat pin that I found in a junk box into the ribbon flower on the waist as well as a butterfly and Prima bling.  On the bodice I used lace and some flowers that I bought in the floral dept at Hobby Lobby.  I found a vintage hat on line that I printed out and colored with Smooch Paint in Turquoise.  Along the neck and shoulder I used Mudd Puddles Sea Glass for a finishing touch.


I hope you enjoyed my dress form. Next up is Sue

I'm sure she has something AMAZING to share with you! 


In case you get lost along the way, here is a list of the Addicted 2 Scrapping Design Team members hopping today: 


Sandy <-------This is me and you are here now ;o) 


Thanks for coming by and playing along!


Check back here soon to see some new things that I have been working on!!!

See you soon ;o)

Sandy